Salty Sam’s Fun Blog for Children
Number 126
Cat’s eye Studs
Hello Everyone
ln the Rusty Anchor lnn on the harbour wall of the Rocky Bay Harbour, we often have pub quizzes where the residents of Rocky Bay and any passing holiday-makers can compete for prizes by answering general knowledge questions.
l have heard that the most asked question in pub quizzes is ‘who invented the cat’s eye stud?’
The answer as you may already know is Percy Shaw.
But do you know the story about how he got the idea to invent the cat’s eye stud?
Last week, l was telling you about how some countries drive on the left and some drive on the right, and so this week l thought l would tell you how people keep on the road in the dark and the fog.
Have you ever travelled in a car with your mum or dad along country lanes and noticed how there appears to be a line of bright white lights running along the centre of the road in front of you that disappear once they are behind the car? That is because they are not really lights but reflectors that are bouncing back the light from the headlights of your car.

One dark, foggy night in 1933, Percy Shaw was driving along a steep, narrow road in Yorkshire. The road was full of twists and bends with a bank of solid rock on one side and a dangerous drop on the other.
Suddenly he drove into a fog bank, and although he knew the road well, he felt totally lost and disorientated.
He knew that because he could not see where he was going, he was in terrible danger.
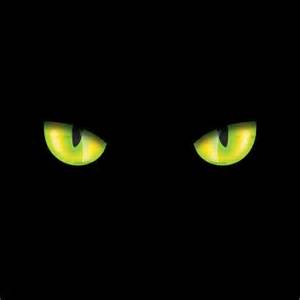
Just at that moment, he saw two pin points of light in the darkness. They were the reflections from a cat’s eyes as it sat at the side of the road. These acted as a guide to show him where the edge of the road was.
He was just thinking how it would be so useful to have more cats sitting along the side of the road, when he came to the main road and there he saw some tramlines gleaming in his headlights.
This gave him the idea of inventing the cat’s eye stud. Many of these studs could be put along the centre of the road to guide motorists.
The cat’s eye stud he invented was a glass reflector placed in a hard rubber case.
This hard case was put inside a soft rubber case which was set into the middle of the road.
When a car or snowplough drove over it, the stud would squash down into the road and as it did so, the reflectors passed over some wipers positioned inside the case and these wipers cleaned the reflectors.
Once the cat’s eye stud popped back up again, any dust on it would have been wiped away. Any rainwater trapped in the bottom of the casing would also help to clean the stud.
The idea spread all over the world.
Bye bye everyone – don’t forget to subscribe to my blog!
lf you like my blog, please support it by telling all your friends and followers about it.
Thank you!
And see you again next Fun Friday!
Love and kisses
Salty Sam

www.christina-sinclair.com


Bill and Bob’s Joke of the Week![]()
![]()
Bob: What do you get if you cross a cat with a dog?
Bill: l don’t know what do you get if you cross a cat with a dog?
Bob: An animal that chases itself!
Salty Sam © Christina Sinclair 2015
Unauthorized use and/or duplication of material from this blog without express and written permission from this blog’s author and owner is strictly prohibited.
Links may be used to www.christina-sinclair.com

Picture Gallery

A cat’s eye stud seen from above
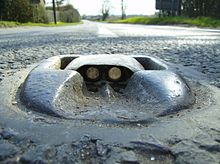 A cat’s eye stud set in the middle of the road
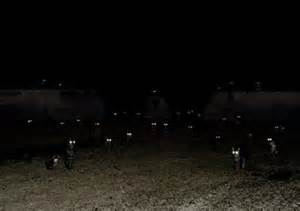 Cats’ eyes


 THE SALTY SAM NEWS DESK

I hope you have all been enjoying the summer weather this week. If you like knitting in the garden you might like another knitting pattern to try out. My Auntie Alice has knitted Emily’s doll another garment this week. This time it is a black and yellow bomber jacket.

NEWSDESK MINIMAKE
A 12” DOLL BOMBER JACKET
BACK (KNIT ONE)
Using 3½mm knitting needles and black dk yarn cast on 14 stitches
Knit 2 rows of 1 x 1 rib
Change to 4mm knitting needles and yellow dk yarn
Increase 2 stitches into the beginning of the next 2 rows of stocking stitch (18sts)
Knit 18 rows stocking stitch
Cast off 4 stitches
Join on black yarn cast off another stitch
Now working in black P1 k1 p1 k1 p1 k1 p1
(You should have 8 black stitches on your right needle and 5 yellow on your left needle)
Turn and working on the black stitches k1 p1 k1 p1 k1 p1 k1 p1
Turn
Cast off in the next row
Join the yellow yarn onto the remaining 5 stitches
Cast off
FRONTS (KNIT TWO)
Using 3½mm knitting needles and black dk yarn cast on 14 stitches
Knit 2 rows of 1 x 1 rib
Change to 4mm knitting needles and yellow dk yarn
Decrease 1 stitch at the beginning of the next row knit to end
Decrease 1 stitch at the beginning of the next row purl to end (10sts)
Purl 1 row, knit 1 row
Knit 1 row, purl 1 row, purl 1 row, knit 1 row
Repeat the last 4 rows 5 times
LEFT FRONT (KNIT ONE)
Cast off 4 stitches
Put all the stitches back on the left needle
Join on the black yarn
K1 p1 k1 p1 k1 p1
Repeat last row once
Cast off
RIGHT FRONT (KNIT ONE)
Join on black yarn
K1 p1 k1 p1 k1 p1
Repeat last row once
Cast off
Rejoin yellow yarn to the remaining 4 stitches
Cast off
![]()
TO MAKE UP
Embroider or sew a motif to the back of the jacket
Use over-sew stitching to make up garment
Sew up shoulder seams
Sew underarm and side seams
Sew three snap fasteners to front edges
You could decorate the front with buttons and a motif if you wanted to
JACKET SLEEVES (KNIT TWO)
Using 3½mm knitting needles and black dk yarn cast on 8 stitches
Knit 2 rows of 1 x 1 rib
Change to 4mm knitting needles and yellow dk yarn
Increase 1 stitch into each stitch as you knit to the end of the row (16sts)
Purl 1 row
Knit 20 rows stocking stitch
Cast off


*********************
TO ADVERTISE ON THIS BLOG
PLEASE CONTACT:
christina.sinclair.ads@aol.co.uk
*********************


Quick Quiz
Can you un-jumble these words to do with cats?
- llettreoioss
- abbty
- iaesmse
- ursebem
- erapisn
- inggre mot


BLOW MY FOGHORN!!!
PLUS
Salty Sam fans can join in with their comments and share them with children all over the world. You will need to ask permission if you are not an adult.
Enter your e-mail address to subscribe to my blog and receive new Salty Sam Blog Posts for free by e-mail every week. Your address will be kept private and will not be shared with any third party.
Sign me up at the side bar


lt’s the Weekend!

HOW TO MAKE A CAT’S EYE BLANKET FOR YOUR CAT
When you take your cat to the vet, he/she probably gets stressed. Here is a snuggly blanket to put in their pet carrier so that they can be comfortable when they travel.

It would be a good idea for the blanket to have the cat’s smell or your smell on it when you put it in your pet carrier because a familiar smell might make them feel a little less frightened in a strange environment. Remember that smells are very important to animals.
It is hard to explain to an animal that you are taking them to the vet for their own good.
The blanket uses green and yellow yarn, but if you have a Siamese cat you might want to make a blue and white or grey one.
Of course you can use any colours that you like, and if you enjoy doing it you can make a bigger blanket for yourself as well!
These squares hold their shape well and have a nice texture. You could make a multi-coloured blanket for your bed if you love doing lots of knitting, but if you just want to try to make one square you could turn it into a doll’s blanket.

If you want to make a blanket with other people, check that your tension is the same otherwise the squares will be different sizes. If you have different tensions, this problem can be solved by using different sizes of needles.
You will need 2 100g balls of yellow dk yarn and 2 100g balls of green dk yarn to make a blanket that will fold into four and make a lovely soft base for a pet carrier.
FOR EACH SQUARE
Using 4mm knitting needles and dk yarn cast on 25 stitches
K5 p5 k5 p5 k5
P5 k5 p5 k5 p5
K5 p5 k5 p5 k5
P5 k5 p5 k5 p5
P5 k5 p5 k5 p5
K5 p5 k5 p5 k5
P5 k5 p5 k5 p5
K5 p5 k5 p5 k5
Repeat this pattern 3 times
(That is five blocks across and eight blocks up)
Cast off
*Leave enough yarn to sew along 1 edge when you cast on
Knit 24 yellow squares and 24 green squares
TO MAKE UP
Sew the squares together in strips – the yellow squares will all lie in the same direction and the green ones will lie at right angles to them.
Then sew the strips together.
The blanket will be 8 squares by 6 squares.
Crochet an edge in a multi-coloured stripe to neaten the border.
At the sides pick up 1 stitch in the middle of each block and 1 between each block.
At the top and bottom, pick up 2 stitches in each block and 1 between each block.
Make 2 chains in each corner of the first row – 3 in the second, 4 in the third and 5 in the fourth, etc.
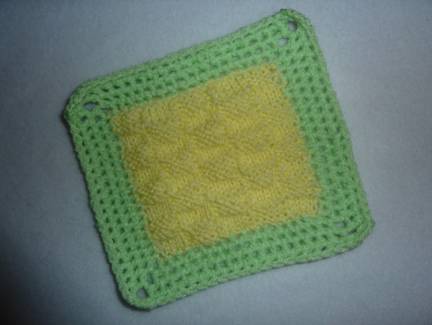
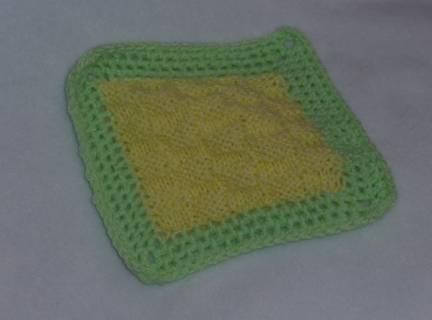


If you want to try some more difficult patterns to make squares, you could try this. But you don’t want any stitch that will pull your knitting in too much because you want to retain the square shape.
This is a more difficult Basket Weave stitch
You will have to cast on a number of stitches that are a multiple of ten.
Knit 6, purl 4 – repeat to end
Knit 4, purl 6 – repeat to end
Knit 6, purl 4 – repeat to end
Knit 4, purl 6 – repeat to end
Knit 6, purl 4 – repeat to end
Purl 4, knit 6 – repeat to end
Purl 6, knit 4 – repeat to end
Purl 4, knit 6 – repeat to end
Purl 6, knit 4 – repeat to end
Purl 4, knit 6 – repeat to end
Keep knitting until your have made a square.
*If you ever leave a piece of knitting for a long time, leave it on a stitch holder or a smaller sized needle because otherwise a line will probably appear across it.
Please note that the material on this blog is for personal use and for use in classrooms only.
It is a copyright infringement and, therefore, illegal under international law to sell items made with these patterns.
Use of the toys and projects is at your own risk.
©Christina Sinclair Designs 2015


Quick Quiz Answers
- llettreoioss – tortoiseshell
- abbty – tabby
- iaesmse – Siamese
- ursebem – Burmese
- erapisn – Persian
- inggre mot – ginger tom

A Burmese cat
 A Siamese cat
And here are some more cat pictures for all you cat lovers out there:
https://uk.pinterest.com/TheSaltySamBlog/cats/


